
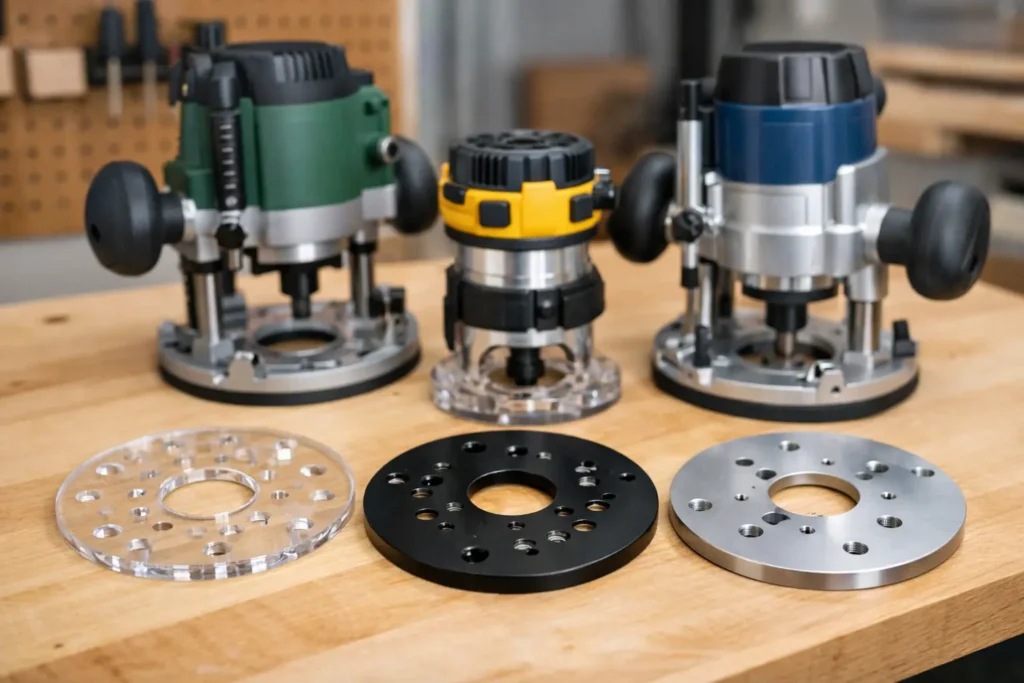
A router baseplate is only useful if it fits the router on your bench. Router brand compatibility is the fastest starting point, but the brand name alone does not guarantee a match. Manufacturers produce multiple router models, and mounting patterns, screw sizes, base diameters, and accessory arrangements can differ within the same brand.
For accurate routing, template work, sign making, inlays, and jig-guided cuts, the plate needs to sit flat, center correctly, and remain secure under normal shop use. Taking a minute to identify the router before ordering prevents the common problem of receiving a plate that is close, but not usable.
Start With the Router Brand, Then Confirm the Model
Selecting your router brand narrows the choices quickly. This is the practical way to shop for a replacement or oversized baseplate because most baseplates are designed around a specific family of routers. A plate made for one manufacturer may have a completely different mounting layout than a plate made for another.
Still, check the exact model number on the router housing, motor label, or original manual. Do not rely only on the router’s color, general shape, or the retailer where it was purchased. Two fixed-base routers from the same company can use different screw locations, while a fixed base and plunge base for the same router motor may not accept the same plate.
If the router has been in service for years, confirm whether it is an older version of a current model. Manufacturers sometimes revise a base assembly without changing the tool’s name in an obvious way. The model number is the useful identifier.
What Determines Router Brand Compatibility?
A compatible baseplate must match more than the outline of the original base. It must mount correctly and support the way you intend to use the router.
Mounting-hole pattern
The hole pattern is the first requirement. Screw holes must align with the threaded holes in the router base or motor housing. Even a small offset can prevent the plate from seating properly or put stress on the screws during use.
Do not force screws into holes that appear almost aligned. Cross-threaded mounting points and distorted plates are avoidable problems. If the screws do not start easily by hand, stop and recheck the model and plate selection.
Screw type and length
Mounting screws are not universal. Diameter, thread pitch, head style, and length all matter. A screw that is too short may not hold adequately. One that is too long can bottom out, interfere with internal components, or prevent the plate from clamping flat.
Keep the original screws until you have confirmed the replacement hardware. If a baseplate includes screws, compare them to the router’s requirements before installation. Flat-head screws must sit flush in their countersinks so the bottom of the plate remains smooth against the workpiece or template.
Center opening and bit clearance
The center opening must provide suitable clearance for the bits and guide bushings you plan to use. A smaller opening gives more support near the bit for fine work, but it limits the size of bits that can pass through. A larger opening accepts larger cutters and some accessories, though it leaves less material around the cutting area.
There is no single best opening size. It depends on the work. A cabinet shop using pattern bits may prioritize clearance. A maker routing small inlay cavities may prefer a plate that provides stable support close to the cut.
Plate diameter and shape
An oversized round or rectangular baseplate increases the router’s bearing surface. That can make it easier to bridge a wide opening, follow a straightedge, or keep the tool steady on a narrow workpiece. It can also improve control when routing edges or using templates.
The trade-off is access. A larger plate may not fit into tight corners, small jigs, or restricted spaces. Choose the plate size around the jobs you do most often, rather than assuming larger is always better.
Check Your Existing Base Before Ordering
Remove the router from power before inspecting or changing the baseplate. Set it on a clean bench and take off the existing plate if needed. This gives you a clear view of the mounting layout and helps identify modifications made by a previous owner.
Compare the original plate to the proposed replacement. Look at the number of screws, their position relative to the center opening, and the shape of the base. Also check for guide-bushing adapters, centering pins, dust attachments, or other hardware that may share mounting points.
A practical pre-purchase check includes these four details:
- Router brand and complete model number
- Fixed-base, plunge-base, trim-router, or specialty-router configuration
- Number and position of mounting screws
- Required opening size, guide-bushing use, and project clearance needs
Photos can help when you are working with an uncommon or discontinued router. A clear photo of the bottom of the router, along with the model number, is far more useful than a description such as “older router” or “standard base.”
Fixed Bases, Plunge Bases, and Trim Routers Are Different Fits
The same motor can be used with more than one base style. That does not mean every accessory plate will transfer between them. A fixed base is often the most straightforward setup for an oversized plate because its mounting surface is simple and stable. Plunge bases can have different geometry, moving parts, or accessory provisions that affect fitment.
Trim routers deserve the same attention. Their compact size is useful for edge work and small templates, but their baseplates are often designed around smaller mounting circles and narrower footprints. A plate intended for a full-size router should not be adapted to a trim router without confirming the mounting pattern and safe clearance.
If you use multiple bases with one router motor, select the baseplate for the base that will actually be used in the project. The motor brand is only part of the answer.
When a Standard Baseplate Is Not Enough
Standard brand-specific baseplates cover many common routers, but not every shop setup is standard. You may be working with a discontinued model, a router modified for a table, a shop-made jig, or a specialized template system. In those cases, a custom plate can be the cleaner solution.
Custom work is especially useful when you need a specific outside diameter, a different center opening, nonstandard mounting holes, or a plate designed around a fixture. The goal is not simply to make something attach. The plate should sit flat, retain enough material around the screw locations, and provide stable support for the work being performed.
Before requesting a custom order, gather the router model, mounting-hole measurements, screw information, desired plate dimensions, and the intended use. If guide bushings, offset fences, template rings, or a particular jig are involved, include that information as well. Clear requirements reduce guesswork and make it easier to produce a plate that works as intended.
Install the Plate Without Creating Alignment Problems
Once you have the correct plate, clean the router mounting surface. Dust, pitch, and trapped chips can keep the plate from sitting flat. Position the plate, start every screw by hand, and tighten them evenly. Do not fully tighten one screw before the others have engaged.
After installation, inspect the bottom surface. The screws should be flush or properly recessed, and the plate should not rock on a flat surface. Install a bit only after confirming that it passes through the center opening without contact.
For precision template work, centering matters. If the plate uses guide bushings or a centering cone, follow the accessory procedure to center the opening on the router collet. A plate can mount securely yet still be slightly off center, which may affect circle cutting, inlay work, or work that depends on a guide bushing tracking accurately.
Buy for the Router and the Work
Router brand compatibility gets you to the correct product category. The final choice should also account for your base style, mounting pattern, bit clearance, and the kind of routing you perform. That approach avoids improvised fitment and gives the router a stable, useful foundation.
If your router does not match a standard option, do not guess at a near fit. Confirm the model, measure the base, and get help with a custom requirement. The right plate should make the next setup easier, not become another problem on the bench.