
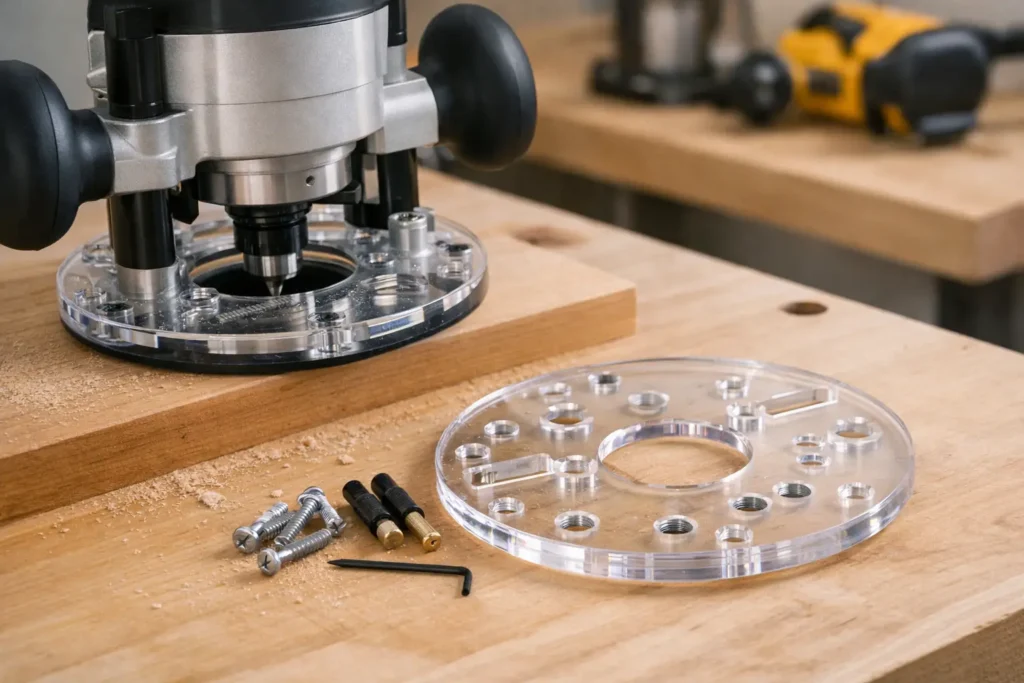
A router that tips at the edge of a board, wanders against a template, or will not accept the guide bushing you need is usually asking for one simple upgrade: a router sub baseplate. This add-on plate attaches beneath the router and gives the tool a wider, flatter, more useful bearing surface for precision work.
For many jobs, the factory base is adequate. But factory bases are often small, shaped around the original tool housing, and limited in their opening or accessory options. A properly matched sub baseplate can make a handheld router easier to control while expanding what it can do.
What a Router Sub Baseplate Does
A router sub baseplate is an auxiliary plate mounted to the bottom of a handheld router. It normally uses the router’s existing base screw locations, replacing the factory base or mounting over it, depending on the router and plate design. Most are made from clear acrylic or another stable sheet material that lets you see the bit, layout line, and workpiece below.
The larger footprint is the first practical benefit. When routing a narrow edge, a small part, or the edge of a cutout, a wider base spreads the router’s weight across more material. That reduces the tendency for the tool to rock toward the unsupported side. The result is better control, especially when cutting dados, pattern-routing parts, or making repeated passes along a jig.
The center opening matters just as much. Many sub baseplates are made to accept a standard guide bushing system. Guide bushings let the router follow a template, fixture, or jig with repeatable offset from the cutting bit. That is useful for hinge mortises, inlay cavities, letter templates, sign work, corner rounding patterns, and other jobs where freehand routing is not accurate enough.
A sub baseplate does not make a dull bit cut cleanly or correct a poorly built template. It does give you a more stable platform and a reliable way to use the accessories that make precision routing possible.
Router Sub Baseplate Fit Comes First
A baseplate is not a universal purchase just because two routers look similar. Router housings can have different base diameters, screw patterns, screw sizes, counterbore requirements, and center-opening dimensions. Even models from the same manufacturer may use different mounting layouts.
Start with the exact router brand and model number. The model number is usually found on the motor housing, nameplate, or original documentation. Do not rely only on a product photo or the router’s general size. A plate intended for one router model may sit slightly off-center or fail to align with another, and a small alignment problem becomes obvious when you use a guide bushing and template.
Before ordering, confirm whether the plate is intended for a fixed-base router, a plunge base, or both. Some router motors fit multiple bases, but the bases themselves may use different mounting locations. If you own a combination kit, identify the base you plan to use for template work.
Also confirm what is included. A plate may be drilled for your router but require you to reuse original screws. Other plates may include mounting hardware. Screw length is not a minor detail. A screw that is too long can bottom out or interfere with the router; one that is too short may not hold securely. The screws should sit flush or below the bottom face of the plate so they cannot scratch the workpiece.
Hobby Woodcraft organizes baseplate choices by router brand because that is the fastest starting point. Brand selection narrows the compatibility question, but the exact model remains the final check.
Centering Is Not Optional
The bit must be centered in the baseplate opening, particularly when you will use guide bushings. If the opening is off-center, the bushing-to-bit offset changes as the router turns. A template cut can become inconsistent even when the template itself is accurate.
After installation, unplug the router and install a straight bit. Lower the bit near a circle, bushing opening, or centering feature in the plate and visually check the clearance from all sides. For close-tolerance template work, use a centering cone or centering pin if your setup supports one. This is worth the extra minute before routing a finished workpiece.
Choose the Plate for the Work You Do
The best plate is not always the largest one. A large plate offers excellent stability, but it can be awkward inside a small jig or near an inside corner. Think about the work you expect to do most often.
For general edge routing and template work, a medium or large clear plate is usually the most useful choice. It provides better support than the factory base without making the router unnecessarily bulky. If you routinely rout narrow stock, such as cabinet face-frame parts, thin rails, or small boxes, extra width is especially valuable.
For inlay and guide-bushing work, make sure the center opening accepts the bushing style you use. Some systems use a standard threaded guide bushing, while others depend on a separate adapter plate. Confirm that the plate, bushing, and bit diameter work together before starting a project. A bushing can only follow a template properly if the bit has enough clearance through the opening.
For work that depends on visibility, clear material is a practical advantage. You can see the bit approaching a layout line, confirm the router is sitting flat on the stock, and spot a clamp or fixture before it becomes a problem. Clear plates will show scratches over time, but surface scratches usually do not affect function. Keep the underside free of hardened glue, pitch, and trapped chips, since any raised debris can mark the workpiece or affect how the router slides.
Install the Baseplate Carefully
Unplug the router before removing the original base or changing hardware. Set the router on a clean bench, remove the factory screws, and keep them organized. If the new plate uses the existing mounting points, place it against the router base without forcing it. All holes should align naturally.
Install each screw loosely at first. Once every screw is started, tighten them gradually in an alternating pattern so the plate seats evenly. Do not overtighten screws in acrylic. Excess force can crack the plate or damage threaded holes in the router base. The goal is firm, flush contact, not maximum torque.
When the plate is installed, place the router on a known flat surface. Check that it does not rock. Run a fingertip across the bottom to confirm that screw heads are not proud of the plate. Then rotate the bit by hand with the router unplugged to verify there is no contact with the center opening, guide bushing, or mounting hardware.
If your plate accepts a guide bushing, install the bushing and repeat the check. The bushing should seat squarely and remain secure. A loose bushing can shift during a cut, which defeats the purpose of using a template in the first place.
Get Better Results From Templates and Jigs
A sub baseplate works best when paired with a stable work setup. Clamp the template so it cannot move, support thin stock from underneath when needed, and make a test cut in scrap material. Template routing is repeatable, but repeatability also repeats mistakes. A quick test confirms the template offset, bit depth, feed direction, and finished fit before you cut the actual part.
Keep the router base fully supported whenever possible. On an outside edge, begin the cut with most of the plate on the workpiece, then move steadily. On narrow material, add a temporary support board alongside the workpiece so both sides of the plate remain supported. This simple setup can prevent a tipped router and a gouged edge.
Use multiple shallow passes rather than forcing a full-depth cut. The baseplate improves stability, but it does not change the limits of the bit, router motor, wood species, or cut direction. Deep passes increase heat and can pull a router against a template or leave burn marks. A controlled sequence of passes is usually cleaner and safer.
When a Custom Baseplate Makes Sense
A standard router sub baseplate is the right answer for many common router models and guide-bushing tasks. Custom work becomes worthwhile when your router has an unusual mounting pattern, you need a special-sized opening, or your jig requires a plate shape that a standard base cannot provide.
A custom plate can also help when a fixture needs specific mounting holes, an offset handle arrangement, or extra width in one direction. For example, a plate used only for a narrow-edge jig may benefit from a wide wing on the unsupported side. The trade-off is that a specialized plate may be less convenient for everyday routing, so it is often best kept as a dedicated jig accessory.
Have the router model, base measurements, screw pattern details, and intended use ready before requesting a custom order. A clear description of the bushing system, bit sizes, and jig requirements helps ensure the finished plate solves the actual setup problem.
The right baseplate should disappear into the work: it fits the router correctly, stays flat, supports the cut, and lets you focus on the line you meant to follow.