
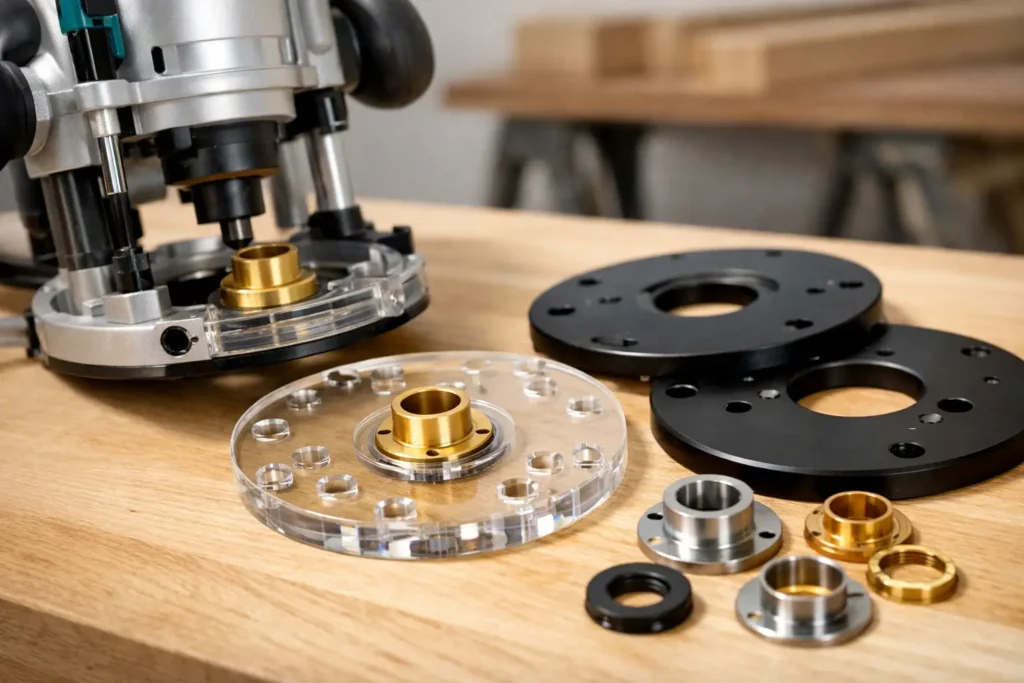
A router baseplate for guide bushings turns a handheld router into a dependable template-routing tool. But the plate only does its job when it fits your specific router, accepts the bushing system you use, and holds the bushing accurately on the bit centerline. A good-looking plate with the wrong mounting pattern or opening is still the wrong part.
For template work, inlays, sign routing, hinge mortises, dovetails, and repeatable joinery, the baseplate is not a minor accessory. It is the surface that carries the guide bushing over the template. Its fit, flatness, and bushing alignment directly affect the cut.
Start With Router Compatibility
The first selection point is always the router model or router brand. Router bases vary in diameter, mounting-hole location, screw size, and screw-head recess. Even routers that look similar can use different hole patterns.
A baseplate must mount securely without modifying the router or forcing screws into holes that do not align. The mounting screws also need to sit flush or below the working face. A proud screw head can catch a template, scratch the workpiece, or change how the router tracks along an edge.
Before ordering, identify the router brand and model number from the tool label. Do not rely only on the outside diameter of the existing factory base. That measurement can help, but it does not confirm the mounting pattern. If your router has been discontinued, has an aftermarket base, or has an unusual mounting arrangement, a custom order may be the better path.
Hobby Woodcraft organizes baseplates by router brand for this reason. Selecting by tool compatibility first avoids the most common purchasing mistake: choosing a plate because its center opening looks right while its mounting holes do not.
What Guide Bushing Support Actually Means
A guide bushing has two working areas: the body that fits through the baseplate opening and the collar or flange that retains it against the plate. The plate needs a properly sized, properly shaped opening for that setup.
Many woodworkers use a common threaded guide bushing arrangement, while others use a separate adapter ring or a proprietary system. These systems are not automatically interchangeable. A baseplate made for one style may not retain another style correctly, even if the bushing body can pass through the opening.
The critical question is not simply, “Will my bushing fit?” Ask whether the baseplate will support the bushing flange squarely and keep it firmly in place during routing. Any looseness lets the bushing shift relative to the cutter. That can show up as an uneven mortise, a poor-fitting inlay, or a template cut that is slightly oversized on one side.
Centering Matters More Than It Looks
The guide bushing must be concentric with the router bit. A small offset is often invisible until you route a tight-fitting part. Then the error follows every edge of the template.
For general pattern work with a larger straight bit, a minor offset may be acceptable. For inlays, lettering, precision jigs, or mating template parts, center the bushing carefully. A centering cone or centering pin can help align the baseplate and guide bushing to the router collet before the mounting screws are fully tightened.
This setup step is especially worthwhile after changing baseplates, installing a new bushing adapter, or moving the plate to another router. Check centering with the actual bushing and cutter combination you plan to use, not just with an empty center opening.
Choose the Plate Size for the Work You Do
A larger baseplate provides more bearing area on the workpiece and template. That extra surface is useful when routing narrow stock, working close to an opening, or using a large template with an interrupted edge. The router feels steadier because the baseplate is less likely to tip.
A smaller plate can be more practical for compact work, tight spaces, and routers that are already easy to control. It also may provide better visibility around the bit. There is no single best diameter. The right size depends on how much support the operation needs and how much access the work allows.
Clear material offers a real advantage for template routing because you can see layout marks, template edges, and the bit area. It does not replace safe routing practice, but it makes setup easier. Thickness matters too. A thicker plate can be stiff and stable, but it reduces the amount of usable cutter length below the base. If you use short bits or route through thick templates, account for that lost depth before starting the cut.
Account for the Guide Bushing Offset
Guide bushings do not cut directly on the template edge. The bushing rides against the template, while the cutter runs inside it. The difference between the bushing outside diameter and the cutter diameter creates an offset.
The offset on one side is calculated as:
(Guide bushing outside diameter – cutter diameter) ÷ 2
For example, a 5/8-inch outside-diameter guide bushing used with a 1/2-inch straight bit creates a 1/16-inch offset per side. If you are making a template for an outside cut, that relationship must be built into the template size. For an inside opening, the direction of the adjustment changes.
This is where a correctly supported bushing pays off. The formula only produces predictable results if the bushing is centered and cannot move. If the bushing sits crooked, the offset changes around the template and accuracy disappears.
Check These Details Before You Order
Use this short fitment check when choosing a router baseplate for guide bushings:
- Confirm the router brand and exact model when possible.
- Identify the guide bushing style, including any adapter or retaining ring.
- Check that the plate opening supports the bushing flange, not just the bushing body.
- Consider whether the plate diameter and thickness suit your normal templates, cutters, and workpiece size.
If any part of the setup is uncertain, do not guess from a photo. Measure the existing baseplate, compare the bushing parts you already own, and provide those details when requesting help. A custom plate can be a sensible solution for a router with a nonstandard hole pattern, an unusual center opening, or a specialized jig requirement.
Install the Baseplate Without Introducing Error
Remove the router bit before changing the baseplate. Clean dust and pitch from the router base so the new plate sits flat. Install the screws loosely at first, then fit the guide bushing and use a centering tool if precision work is planned.
Once centered, tighten the mounting screws evenly. Do not overtighten acrylic or other rigid plate materials. The goal is secure contact without stressing the plate or stripping the router’s threaded holes. Confirm that all screw heads are flush and that the bushing locks in place without wobble.
After installation, make a test cut in scrap using the same template, bushing, bit, and routing direction planned for the project. Test cuts reveal problems that bench inspection can miss, including insufficient bit projection, a template that was sized for a different bushing, or a bushing that is not fully seated.
Use the Setup to Improve Router Control
A guide-bushing baseplate works best when the template is firmly secured and the router is kept flat throughout the cut. Let the bushing contact the template edge without forcing it sideways. Excessive side pressure can deflect a thin template, especially around tight curves.
Make multiple passes when the material or cutter calls for it. The bushing controls the path, but it does not prevent tear-out, burning, or chatter caused by taking too much depth at once. Use a sharp bit, choose a sensible pass depth, and pay attention to grain direction where the template allows it.
Also check the clearance between the guide bushing and the template opening. A bushing that is too large for a small inside radius cannot follow the shape. A smaller bushing may solve the problem, but it changes the template offset. That trade-off is normal in template routing: cutter size, bushing diameter, template geometry, and required finish all work together.
The right baseplate makes that system repeatable. Match it to the router first, confirm the guide bushing arrangement second, and center the assembly before committing to finished stock. When the fit is correct, the router follows the template instead of becoming another variable in the project.