
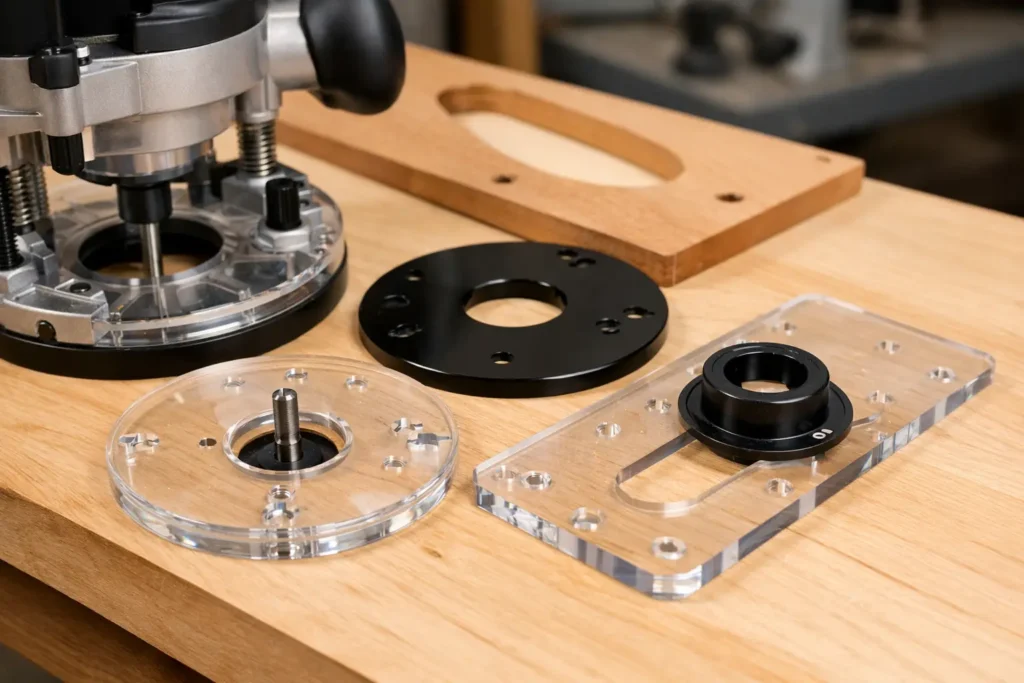
A router can follow a template accurately only when the router stays stable, centered, and easy to control. The right router baseplate for template routing gives you a larger, flatter bearing surface than many factory sub-bases, while providing the opening and mounting arrangement your template setup requires. That matters when a cut line is only as accurate as the relationship between the bit, guide bushing, and template edge.
For furniture parts, cabinet components, signs, inlays, and repeat production, start with router compatibility. A plate that fits the correct router body is more useful than a general-purpose plate that requires modification, uneven screw seating, or improvised centering.
Choosing a Router Baseplate for Template Routing
The first decision is simple: identify the router, not just the router brand. Manufacturers may use different mounting patterns across fixed-base, plunge-base, compact, and older models. Remove the existing sub-base if necessary and verify the screw count, screw spacing, screw size, and center opening before ordering.
A purpose-built baseplate should mount flat against the router base without forcing the screws or leaving a gap around the housing. It also needs countersunk mounting holes so screw heads remain below the working surface. A proud screw head can catch on a template, scratch the workpiece, or push the plate off line during a cut.
If your router has been modified, has an uncommon production year, or uses a nonstandard mounting pattern, a custom plate may be the better choice. Do not assume that a plate listed for one model family will fit every router in that family. Measure first when there is any doubt.
Centering is part of the fit
A baseplate can bolt onto the router and still be poorly centered around the collet. That small offset may not matter when edge-routing with a bearing bit, but it matters greatly with a guide bushing. If the bushing is not concentric with the bit, the cut will be offset from the template differently depending on the direction of travel.
Use a centering pin, centering cone, or the installation method specified for the plate and bushing system. Tighten mounting screws gradually in an alternating pattern after the plate is centered. This is a setup step worth repeating whenever you change plates or install a new bushing arrangement.
Match the Plate Opening to the Template Method
Template routing commonly uses either a guide bushing or a bearing-guided bit. The best baseplate setup depends on which method the project requires.
A guide bushing rides against the template while the bit cuts inside or outside its edge. The bushing mounts in the baseplate opening, so the plate must accept the bushing style you plan to use. Verify whether your bushings use a standard removable guide-bushing adapter, a threaded mounting system, or a dedicated insert. Similar-looking systems are not always interchangeable.
The difference between the bit diameter and the outside diameter of the guide bushing creates an offset. That offset must be included when making or sizing the template. For example, a larger bushing relative to the bit leaves a larger gap between the template edge and the finished cut. This is useful when making inlay templates or roughing passes, but it must be planned before cutting material.
A bearing-guided pattern bit follows the template with a bearing rather than a bushing. In that case, the baseplate opening still needs enough clearance for the bit and safe chip ejection, but bushing compatibility is less important. A bearing bit can be fast and direct for pattern work, though it may not suit small internal openings, delicate templates, or cuts where the bearing cannot reach the template edge.
For many shops, a baseplate that supports guide bushings provides more flexibility. It lets you use one router for pattern work, hinge mortises, inlays, lettering templates, and jig-guided cuts. The trade-off is that you must account for bushing offset and keep the system accurately centered.
Plate Size Changes How the Router Handles
A larger baseplate improves support. When routing along a narrow template, across a cutout, or near the edge of a workpiece, the added surface area helps prevent the router from tipping. This is especially useful for handheld work on cabinet parts and for templates that do not provide a wide landing area.
More plate size is not automatically better. An oversized plate can interfere with clamps, fences, tall template walls, or tight work areas. It can also make a compact router feel less maneuverable during curved cuts. Choose enough surface area to support the work without creating clearance problems around the jig.
Clear acrylic plates are popular because they improve visibility. Seeing the template edge, layout marks, and bit location makes setup easier, particularly with inlay or mortising templates. Thickness also matters. A plate needs to stay flat under normal routing pressure, but an unnecessarily thick plate can reduce available bit projection or change the relationship between a guide bushing and a shallow template.
Look for a smooth, flat bottom surface with cleanly finished edges. Template routing depends on controlled movement. A warped plate, rough edge, or poorly seated insert can create drag and make the router harder to keep against the guide.
Check Your Router and Bit Before Ordering
Before selecting a baseplate, confirm the details that affect real use in the shop:
- Router make, model, and base type, including whether it is fixed, plunge, or compact.
- Mounting-hole pattern and screw requirements on the existing router base.
- Guide-bushing system, if you use one, along with the outside diameter of the bushings you need.
- Largest bit diameter and the clearance required through the plate opening.
- Template thickness, workpiece thickness, and usable cutting length of the intended bit.
The last point prevents a common setup problem. A thick baseplate, guide bushing, and template all consume vertical reach before the bit reaches the workpiece. Check that the cutting edge will extend far enough for through-cuts, deep mortises, or pattern-routing passes. For thick stock, a longer pattern bit, a top-bearing bit, or a two-step routing process may be necessary.
Set Up the Plate Before the Final Workpiece
Install the baseplate, center it, and test the full setup on scrap material. Use the same template thickness, bushing, bit, and router depth you will use for the finished part. A short test tells you whether the template offset is correct and whether the plate has sufficient support at the edges of the cut.
Keep the baseplate clean as you work. Dust or chips trapped between the plate and the template can lift one side of the router enough to affect a close-fitting joint. Waxing a clean template surface can reduce friction, but do not let wax build up where it changes the template edge or transfers to a finish-sensitive workpiece.
For larger cuts, remove waste in multiple passes instead of forcing a full-depth cut. The baseplate helps keep the router stable, but it does not eliminate the need for sensible feed direction, firm template clamping, and controlled depth increments. Climb cutting may help prevent tear-out in limited situations, but it can pull a handheld router unexpectedly. Use it only when you understand the direction of force and can control the tool securely.
When a Standard Plate Is Not Enough
A standard router baseplate is the practical choice when your router model, template system, and work style match common configurations. Custom work becomes worthwhile when you need an unusual mounting pattern, a specific opening size, extra-wide support, an offset shape, or special holes for a jig or accessory.
Custom does not mean complicated. Have the router model, mounting dimensions, desired plate size, center-opening requirement, and intended use ready before requesting one. A clear description of whether the plate is for guide bushings, sign templates, hinge jigs, inlay work, or a dedicated fixture helps define the right layout.
Start with the router model, verify the mounting pattern and bushing system, then test the setup on scrap. A properly fitted plate turns template routing from a balancing act into a repeatable operation.