
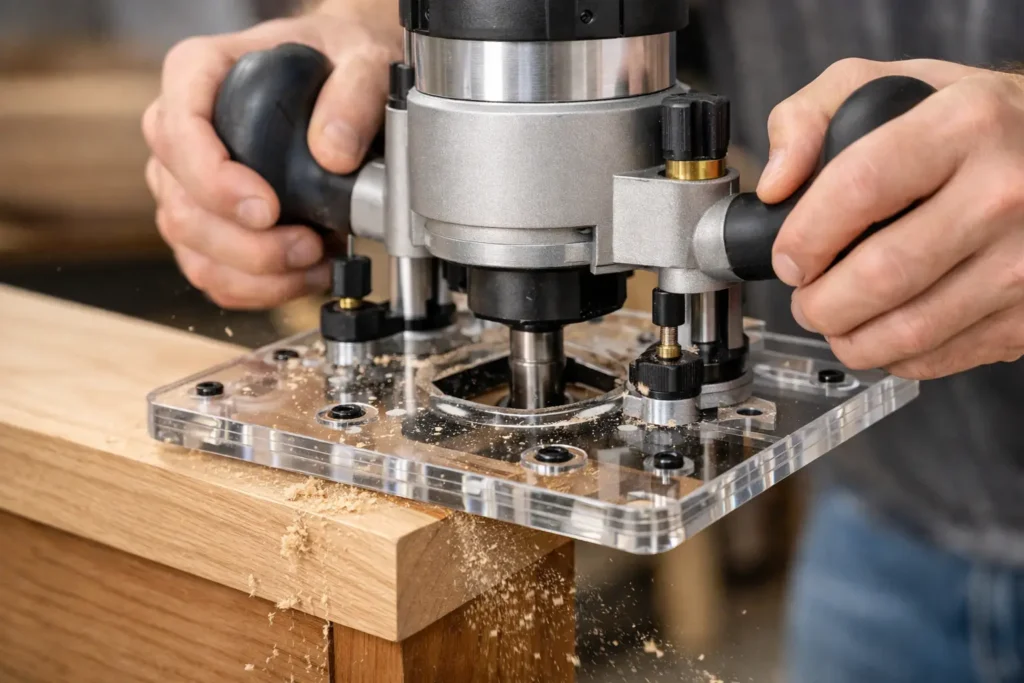
A router can have a strong motor and a sharp bit, yet still feel difficult to control when the factory base is too small, worn, or poorly suited to the work. A custom router baseplate changes the contact area between the router and the workpiece. That can mean steadier edge work, more reliable template routing, and a clearer view of the cut line.
The right plate is not a universal upgrade. It must match the router’s mounting pattern, support the bit and guide setup you use, and fit the kind of work on your bench. Start with your router brand and model, then confirm the details before ordering.
What a Custom Router Baseplate Does
A router baseplate is the flat plate mounted to the bottom of a handheld router. It supports the router as it moves across a workpiece, keeps the tool at a consistent height, and provides the opening around the bit. Many original bases are designed for general use. They work, but a larger or purpose-built plate can provide more support where the factory part falls short.
The benefit is most noticeable when the router is close to an edge, following a template, or making a controlled pass on a narrow part. More plate surface helps resist tipping. A clear plate can also improve visibility when positioning a bit on layout marks. For jigs and repeat work, a plate made for a specific guide bushing or mounting arrangement can reduce setup time and remove guesswork.
A larger baseplate is not automatically better. An oversized plate can make a compact router harder to use in tight corners or on small workpieces. The goal is enough stable support for the job without adding bulk that gets in the way.
Match the Baseplate to the Router First
Router-brand selection is the fastest starting point because mounting-hole patterns are not interchangeable. Two routers may look similar from above while using different screw locations, screw sizes, centering features, or base dimensions underneath. A plate that nearly fits is not a fit.
Before selecting a baseplate, identify the exact router model. Check the model label on the motor housing or base, not just the brand name printed on the tool. Manufacturers often produce several routers with different base configurations, including fixed-base, plunge-base, compact, and older versions of the same line.
Then confirm these practical details:
- The mounting-hole pattern and screw type must match the router base.
- The center opening must accommodate the largest bit or guide bushing you expect to use.
- The plate shape and diameter must suit your intended work, especially edge routing and template work.
- Any added features, such as guide-bushing provisions or jig mounting holes, must match your accessories.
Do not assume the original screws will work with every replacement plate. Plate thickness can change the required screw length. Screws that are too short may not engage enough threads. Screws that are too long can bottom out or interfere with internal components. Use the hardware specified for the plate and verify that the router base sits flat before turning the tool on.
Choose the Plate Size for the Work You Do
Baseplate size affects stability, reach, and maneuverability. A wider round or rectangular plate is often useful for template routing, cutting mortises with a jig, leveling an inlay, or working along a board edge. The additional footprint gives the router more support when part of the plate extends beyond the workpiece.
For cabinet and furniture work, extra support is valuable when routing hinge mortises, dadoes with a guide, or profile edges on narrow stock. For sign making and inlay work, visibility and predictable registration may matter more than maximum size. For a trim router used on small parts, a compact plate may be the better choice because it keeps the tool easy to handle.
Think about the job from the router’s point of contact. If the plate will frequently bridge an opening, ride against a fence, or hang over an edge, choose a design with enough surface on both sides of the bit. If you mainly use the router inside a small template, confirm that the outside dimensions of the plate will clear the template walls and clamps.
Opening Size and Guide Bushing Requirements
The center opening is one of the most overlooked parts of a baseplate. A small opening provides more material around the bit and can improve support on narrow work. It may also limit the diameter of bits that can pass through it. A larger opening gives clearance for larger cutters, but removes support close to the bit.
Guide bushings add another requirement. If you use templates for mortises, inlays, pattern work, or repeated joinery, the plate must accept the guide-bushing style you use. Confirm how the bushing mounts and whether the opening is designed for that system. A bushing that sits off-center will transfer that error to every routed cut.
Centering matters even when no bushing is installed. The bit should run concentrically within the opening. If the plate is not centered, it can affect template offsets, circle-cutting attachments, and any jig that depends on a known distance from the bit to the edge of the plate. Install the plate carefully, then check alignment with the router unplugged before using it on a finished piece.
Material and Thickness: Practical Trade-Offs
Many router baseplates are made from clear plastic or acrylic-type materials because they provide a good view of the workpiece. Visibility is useful when aligning a bit to a pencil line, following a template, or beginning a stopped cut. A smooth, flat plate also helps the router glide without marking the wood.
Thickness affects stiffness and hardware fit. A thicker plate can resist flexing over a wider area, which is helpful on large bases and jigs. It may also raise the router slightly, changing the available bit depth. On a plunge router or a router with limited adjustment range, that change may matter. Measure your usable bit projection if your work requires deep cuts.
The best choice depends on the router and application. A small router used for light edge profiles may not need a heavy, oversized plate. A router dedicated to pattern work or jig use may benefit from a more specialized setup. Buy for the operation you repeat, not for a feature you may never use.
When a Standard Plate Is Not Enough
Custom work is the right path when the router is an uncommon model, the original base has a nonstandard configuration, or the project requires a specific layout. You may need a plate with a particular outside shape, a different center opening, custom mounting holes, or features intended to work with a shop-made jig.
Provide accurate information when requesting a custom order. The router brand and exact model are essential. Clear measurements of the original base, hole spacing, screw size, and desired plate dimensions help avoid delays. If the plate needs to work with a template guide, circle jig, fence, or dedicated fixture, describe that use before the plate is made.
Photos of the underside of the router base and the original plate can be useful when identifying unusual patterns. Measurements should be taken carefully and repeated. A small error in hole location can prevent proper mounting, while an incorrect center opening can limit the accessories the plate was meant to support.
Hobby Woodcraft organizes baseplate choices by router brand to make the standard fitment process faster, with custom-order support available when a normal replacement does not meet the requirement.
Install and Test Before a Finished Cut
Installation should be straightforward, but it deserves a quick inspection. Unplug the router. Remove the existing plate, clean dust from the mounting surface, and install the new plate with the correct screws. Tighten the screws evenly so the plate remains flat. Do not overtighten fasteners in plastic material.
Set the router on a known flat surface and look for rocking. Spin the bit by hand with the tool unplugged to confirm it clears the opening. If you use a guide bushing, install it and check that it seats correctly. Then make a test pass in scrap wood using the same bit, depth, and guide method planned for the actual project.
This test is where a good setup proves itself. Watch for a smooth glide, stable support near edges, proper bit clearance, and accurate template offset. If the router feels less controlled than expected, the plate may be too large, too small, or simply not suited to that operation.
A baseplate is a small part, but it directly affects how the router meets the work. Match it to the exact router, choose the size and opening for the jobs you actually perform, and test the setup in scrap before committing to a finished board. That is the practical route to cleaner, more controlled routing.