
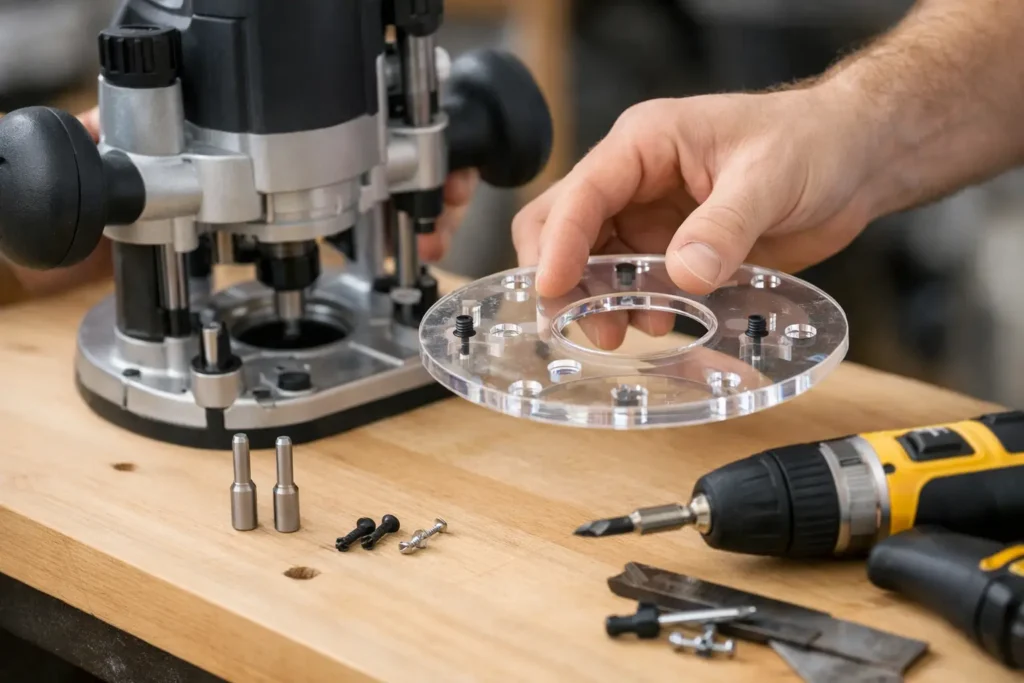
A router baseplate only works as well as its fit on the router. If the plate is off-center, the screws bottom out, or the bit cannot clear the opening, even a good router can become harder to control. Knowing how to install router baseplate hardware correctly gives you a stable reference surface for template work, edge routing, inlays, and shop-made jigs.
Start by matching the baseplate to your router brand and model. Mounting patterns vary, even among routers from the same manufacturer. A plate made for the wrong model may look close enough to fit, but a near match can leave holes misaligned or place the bit opening off center.
Before You Install a Router Baseplate
Unplug the router before removing its factory base or working around the collet. Remove the bit if one is installed. This prevents an accidental start and makes it easier to inspect the opening and mounting hardware.
Set the router upside down on a clean bench with the motor housing supported. Avoid resting it on a sharp bit, switch, cord connection, or depth-adjustment mechanism. A folded towel, router pad, or piece of clean cardboard helps prevent scratches while keeping the router stable.
Before taking anything apart, look at the existing base. Note the screw locations, whether there are countersunk holes, and whether the original base uses washers or special screws. Take a quick photo if the hardware arrangement is not obvious. It can save time if your router uses different screw lengths in different positions.
You will typically need a screwdriver or hex key that fits the factory screws correctly, the supplied mounting screws, and a small brush or compressed air to clear sawdust from the screw holes. Keep the original screws in a labeled container. They are worth saving if you reinstall the factory base later.
Confirm Router and Baseplate Compatibility
Do not choose a baseplate by outside diameter alone. The mounting-hole pattern, center opening, plate thickness, and screw-counterbore depth all matter. A compatible plate should sit flat against the router base without forcing the screws into position.
Check these details before installation:
- The router brand and exact model match the intended baseplate.
- The mounting holes align without enlarging, bending, or modifying the plate.
- The center opening clears the largest bit or guide bushing you plan to use.
- The mounting screws engage securely without protruding into the router body.
A custom baseplate may be the better choice when your router has an uncommon mounting pattern, a specialty guide bushing, an oversized bit opening, or a project-specific need. Do not drill a standard plate unless you are certain the new holes will preserve the plate’s strength, balance, and countersink depth.
Remove the Factory Router Base
Locate the screws holding the factory sub-base or baseplate to the router. Use a driver that fully seats in the screw head. Router screws are often installed tightly, and a loose-fitting Phillips driver can strip the head quickly.
Loosen each screw gradually rather than removing one completely first. Work around the pattern a little at a time to keep tension even. Once the screws are out, lift the factory base straight away from the router. If it feels stuck, check for a missed screw instead of prying against the housing.
Clean the mounting surface after removal. Fine dust, dried finish, or a chip caught between the router and new plate can keep the baseplate from sitting flat. A plate that rocks even slightly will affect router stability and can make template-guided cuts inconsistent.
Inspect the screw holes in the router. The threads should be clean and undamaged. If a screw feels cross-threaded, stop immediately. Back it out, realign it by hand, and try again. Forcing a screw can damage the threads in the router housing and turn a simple baseplate installation into a repair.
How to Install Router Baseplate Hardware
Place the new baseplate against the router with the correct side facing out. On many clear acrylic baseplates, the countersunk side faces away from the router so the screw heads sit flush with the bottom surface. A flush surface matters because raised screw heads can catch on a template or workpiece.
Align all mounting holes before tightening any screw. Start each screw by hand for several turns. This confirms that the thread is engaged properly and gives you a chance to verify that every hole lines up. If one screw will not start easily, do not pull the plate into place with the other screws. Remove the hardware and find the source of the misalignment.
Once all screws are started, tighten them in a crisscross pattern. Bring each screw snug in small increments rather than fully tightening one corner at a time. This helps the baseplate settle evenly against the router.
Tighten the screws firmly, but do not over-tighten them. This is especially important with acrylic or phenolic plates. Excessive force can crack a clear plate, distort a thinner plate, strip the router threads, or cause the screw head to sit below an uneven countersink. The plate should be secure, flat, and free of movement, not crushed against the router.
After tightening, run a fingertip across the working face of the plate. The screw heads should be flush or slightly below the surface. If a screw sits proud, stop and correct it before using the router. A proud screw can scratch a template, affect the cut, or snag at the edge of a jig.
Check Bit and Collet Clearance
Install the bit you expect to use most often with that baseplate, then confirm it passes through the center opening without touching the plate. Raise and lower the router through its travel if you use a plunge router. On a fixed-base router, check that the bit can be adjusted to the needed cutting depth without contact.
The opening should provide reasonable clearance, but larger is not always better. A very large opening gives less support around narrow workpieces and may reduce visibility of the cutting line. Choose the opening size that suits your normal bits, guide bushings, and jig work.
If you use a guide bushing, install it and check that it seats properly. Some baseplates are designed for a specific bushing style, while others require a mounting adapter or a differently sized opening. Confirm this before routing a template. A bushing that is loose, tilted, or not fully seated will transfer errors directly to the workpiece.
Center the Baseplate When Precision Matters
For general edge profiling, a slight difference in plate position may not matter. For inlays, circles, lettering templates, hinge mortises, and guide-bushing work, centering the baseplate around the collet matters a great deal.
Use a centering pin or centering cone that fits the router collet and the baseplate opening. With the mounting screws slightly loose, install the centering tool, let it position the plate concentrically around the collet, then tighten the screws in a crisscross pattern. Remove the centering tool and recheck that the plate remains flat.
If you do not have a centering tool, you can visually check the gap around a straight bit, but this is less accurate. It may be acceptable for a large-opening baseplate and non-template work. For projects where the distance from a guide bushing to the bit determines the final size, use a proper centering method.
Test the Setup Before Cutting a Project
With the router unplugged, place it on a known-flat surface and check for rocking. Rotate the router slowly and inspect the plate edge. Any movement suggests debris, a warped plate, an incorrect screw, or uneven tightening.
Then install a bit, set a shallow cutting depth, and make a test cut in scrap material. Listen for vibration and check the cut for wandering or unexpected changes in depth. If you are using a template or guide bushing, test that exact setup before moving to finished stock.
Also check your handles and grip position. An oversized baseplate can improve stability, but it changes how the router feels in use. Make sure your hands can stay clear of the bit path and that the plate does not interfere with depth locks, switches, dust collection, or fence accessories.
Common Installation Problems
If the screws do not sit flush, verify that you are using the correct countersunk screws and that the plate is facing the right direction. Do not substitute a screw with a larger head just because it fits the threads. The wrong head profile can project below the plate.
If the screw is too long, it may bottom out before clamping the baseplate or interfere with internal router components. If it is too short, it may not have enough thread engagement to hold safely. Use the hardware intended for the plate and router combination whenever possible.
If the plate shifts during use, unplug the router and inspect all screws. A loose plate is not a minor annoyance. It changes the relationship between the bit, template, and router base, which can ruin a precise cut or create an unsafe handling condition.
A properly fitted baseplate should disappear from your attention once the router is running. It should sit flat, stay centered, clear the bits and bushings you use, and give you more support where the work calls for it. When the router model or mounting pattern is unusual, getting the correct fit first is faster than trying to make an almost-compatible plate work.