
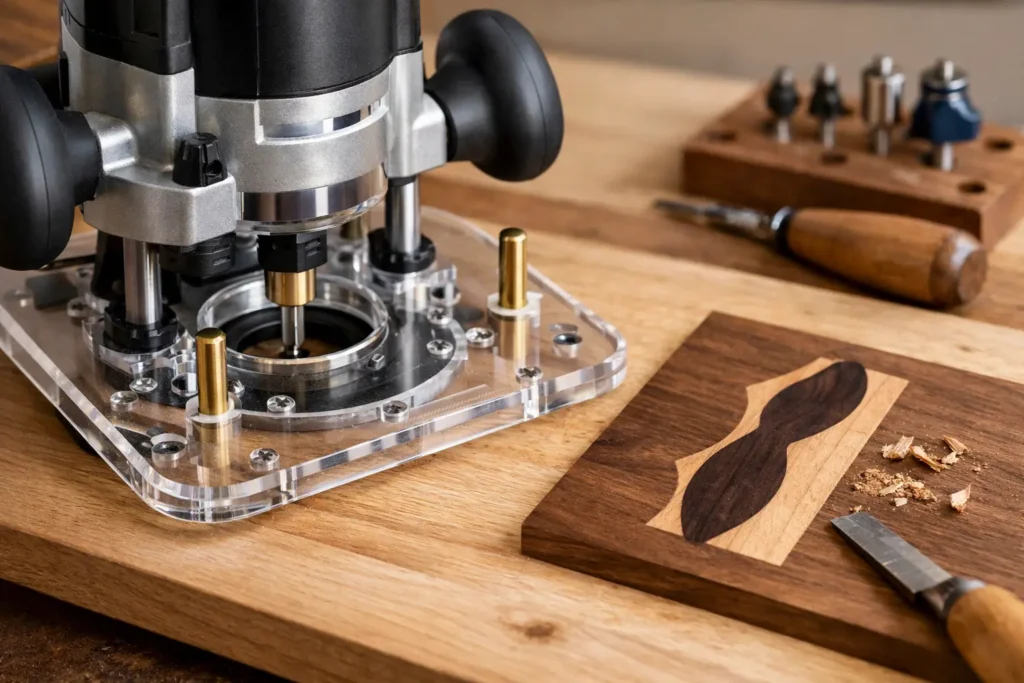
An inlay can be ruined before the bit touches the wood. A router baseplate for inlay routing has to sit flat, stay centered on the cutter, and give the router enough support around a small template opening. If the plate does not match your router correctly, even a carefully made template can produce gaps, uneven depths, or a cut that wanders at the edge.
For inlay work, compatibility comes first. Plate size, material, guide-bushing setup, and the type of work you are routing all matter. The right baseplate is not necessarily the largest available or the one with the most features. It is the one that fits your router securely and supports the routing method you actually use.
Start With Router Compatibility
A baseplate is only as accurate as its connection to the router. Mounting-hole patterns vary by router brand and, in some cases, by model within the same brand. A plate that is close to fitting is not good enough for precision inlay routing. Misaligned holes, loose screws, or a plate that shifts under pressure can move the cutting path by enough to show up as a visible gap around the inlay.
Identify the router make and exact model before choosing a replacement or upgraded plate. Confirm the mounting pattern, screw size, and whether the router uses a factory sub-base that must be removed. Also check for raised features on the router base, such as depth-adjustment parts or edge-guide mounting points, that may affect how the plate seats.
The baseplate should sit fully against the router base without rocking. Screws should pull it down evenly and finish flush or below the working surface. A proud screw head can catch on a template, scratch the workpiece, or lift the plate slightly as the router moves. That small interruption is enough to change the inlay cavity.
If your router has a nonstandard pattern, has been modified, or needs a plate for a specific fixture, a custom order may be the better route. Forcing a generic plate onto the tool defeats the purpose of adding a precision accessory.
Why a Router Baseplate for Inlay Routing Needs More Support
Inlay routing often happens inside narrow templates and close to a workpiece edge. The factory base on many handheld routers is adequate for general edge profiling, but it may not provide enough surface area when the router is riding on a small template or crossing a narrow section of material.
A larger, flat baseplate spreads the router’s weight over more of the template. That reduces tipping and makes it easier to hold a consistent cut depth. This is especially useful when routing letters, decorative bands, small box lids, curved shapes, and thin inlay pockets.
More plate size is not always better, though. An oversized plate can interfere with clamps, fences, raised workpiece features, or the inside corners of a jig. It may also make it harder to see the cutter location. Choose enough surface area to stabilize the router, while leaving practical access to the work.
Clear material is useful when visibility matters. Being able to see reference lines, template edges, and the bit area helps when starting a cut or checking your position near a corner. Opaque plates can still work well when the template controls the cut completely, but clear plates provide an extra visual check during detailed work.
Match the Plate to Your Inlay Method
There are several ways to route an inlay, and the baseplate should work with the guide system you use.
A common method uses a template guide bushing and a straight or spiral bit. The bushing rides against the template while the bit cuts the pocket. A matching offset system can then be used to make the inlay piece. In this setup, the opening in the baseplate must accept the guide bushing securely and concentrically.
Concentricity means the bushing is centered on the router bit. If it is off-center, the router cuts a different offset depending on the direction of travel. The result may be an inlay that fits on one side but leaves a gap on another. This problem is often blamed on the template, when the actual cause is a baseplate or guide setup that is not centered.
Some woodworkers use guide-bushing systems designed specifically for inlay work. Others use a pattern bit with a bearing, a collar system, or a dedicated inlay kit. Before selecting a baseplate, verify the center opening and mounting arrangement needed for your hardware. A plate with a convenient large opening is not automatically compatible with every guide-bushing style.
If you use multiple bushings, consider a baseplate that allows repeatable installation. The goal is not to constantly adjust the plate. The goal is to mount it, center it, verify it, and keep the setup consistent from one project to the next.
Check Centering Before Cutting Project Material
Install the baseplate and guide bushing, then run a simple centering check on scrap. Use a drilled reference hole, a centering pin, or a purpose-made centering cone if you have one. The bit should align with the center of the bushing opening before you route the actual template.
Then make a test pocket and matching inlay piece using the same setup, bits, and material thickness planned for the project. Test cuts reveal offset errors, bushing movement, and depth issues quickly. They also show whether your template method produces the fit you want: snug enough to register cleanly, but not so tight that the inlay cracks or refuses to seat.
Plate Thickness, Flatness, and Bottom-Surface Details
A baseplate needs to be rigid enough to remain flat under normal routing pressure. Thin material can flex if the router is pushed hard or supported unevenly across a template. Flex changes bit position relative to the guide and can create inconsistent results, particularly in tight curves.
A flat bottom surface matters just as much. The baseplate should glide across the template without snagging. Countersunk mounting screws need to be flush, and the guide-bushing flange should not protrude where it can contact the work unexpectedly. Keep the plate clean as well. A bit of hardened glue, resin, or packed dust on the bottom can tilt the router more than you might expect.
Smooth edges are useful when working around fragile templates or delicate veneer. Sharp corners on a plate can catch a clamp, push against a template stop, or mark a finished surface. A rounded or eased perimeter is easier to control in close work.
Set Up for Control, Not Speed
Inlay cavities are usually shallow, but they still benefit from controlled passes. Trying to remove all the material at once can cause the bit to pull against the template, chatter in the cut, or leave a rough floor. Make multiple passes when the material, bit diameter, or inlay shape calls for it.
Keep the router baseplate fully supported on the template whenever possible. At narrow template sections, pause and check where the plate is bearing. If most of the plate is hanging over an open cavity or the edge of the workpiece, the router can tip. Add a support board of the same thickness next to the work when needed. This simple step provides a stable surface and prevents a sudden deep cut at the edge.
Use a sharp bit sized for the detail in the template. A smaller bit handles tighter curves but takes longer and is more prone to deflection if pushed too hard. A larger bit clears material efficiently but may not reach sharp internal corners. The baseplate cannot compensate for a bit that is wrong for the shape, but it helps you guide the correct bit with more control.
Common Problems a Better-Fitting Plate Can Prevent
When an inlay fit is inconsistent, inspect the baseplate before remaking the template. A loose mounting screw, worn guide-bushing threads, or a plate that is not centered can cause errors that repeat across every cut.
Watch for these practical signs:
- The router rocks when set on a flat surface.
- The guide bushing shifts or does not sit square in the plate.
- Screw heads drag across the template or workpiece.
- The plate opening does not suit the bushing or collar system being used.
- The router tips when crossing narrow template areas.
Not every inlay problem comes from the baseplate. Template thickness, bit runout, router-bearing wear, wood movement, and cutting direction can all affect the result. Still, a secure, flat, correctly centered plate removes one major source of avoidable error.
Choose the Plate Around the Router You Own
Do not start by choosing a plate based only on a photo or a general description. Start with your router brand and model, then confirm the work you need the plate to do. For inlay routing, prioritize accurate fitment, a stable working surface, compatible guide-bushing capacity, and a layout that does not interfere with your templates or fixtures.
If a standard option does not match your router or project setup, provide the details before ordering: router model, mounting-hole information, desired plate size, guide-bushing requirement, and any unusual clearance needs. Hobby Woodcraft can help with custom requirements when an off-the-shelf plate is not the right answer.
A clean inlay begins with a router that tracks exactly where the template tells it to. Fit the baseplate correctly, center the guide system on scrap, and give the router solid support before making the first cut in your finished workpiece.